In modern industrial production and high-tech research and development, cleanrooms have become essential for ensuring product quality and process stability. As technology advances, the requirements for cleanroom environments have become increasingly stringent—any minor contamination can lead to product defects, reduced performance, or even safety risks. Therefore, maintaining a pristine cleanroom environment is a critical concern for industries worldwide. Among the many cleaning solutions available, 70% isopropyl alcohol (IPA) presaturated wipes have emerged as the preferred choice due to their outstanding cleaning effectiveness and ease of use.
Why Cleanrooms Demand High Standards for Cleaning

Isopropyl alcohol (IPA) and alcohol wipes are essential for effectively cleaning electronics, as they remove oils, flux residues, and fingerprints without leaving residue behind.
Cleanrooms are designed to control contamination by regulating airborne particles, temperature, and humidity.
However, maintaining a clean environment involves more than just air filtration—regular cleaning of work surfaces, equipment, and tools is essential to prevent contamination. Traditional cleaning methods often suffer from inconsistent solvent concentrations, uneven application, and time-consuming procedures that fail to meet the high standards of cleanroom environments.
70% IPA is widely used as a cleaning agent because of its balanced evaporation rate and strong disinfecting properties. Presaturated wipes, which are manufactured under strict conditions to ensure uniform solvent distribution, provide a consistent and efficient cleaning solution.
Unlike traditional methods that require manual solvent application, presaturated wipes eliminate the risks of incorrect dilution and secondary contamination, making them an ideal choice for maintaining cleanroom standards.
Advantages of 70% IPA Presaturated Wipes
1. Uniform Saturation for Consistent Performance
Each presaturated wipe undergoes a meticulous saturation process to ensure a precise 70% IPA concentration. Whether used for cleaning equipment, workbenches, or other sensitive surfaces, these wipes deliver uniform coverage and thorough decontamination. This consistency is especially important in environments where even the smallest impurities can compromise product quality.

These alcohol-based antibacterial wipes are pre-wetted with a 70% isopropyl alcohol and are designed for effective disinfection in medical, food, electronics, and precision industries.
2. Lint-Free Materials for Residue-Free Cleaning
These wipes come in a variety of non-linting materials, including polyester, microfiber, polypropylene, and nonwoven fabric. Their high absorption capacity allows for effective dirt and particle removal while preventing fiber shedding, which is crucial for industries that demand pristine surfaces, such as semiconductor and pharmaceutical manufacturing.
3. Reduced VOC Emissions for a Safer Work Environment
One of the significant concerns in industrial cleaning is the emission of volatile organic compounds (VOCs). 70% IPA presaturated wipes are designed to minimize solvent evaporation, ensuring that operators are exposed to lower VOC levels while still benefiting from effective cleaning. This design contributes to a safer and healthier working environment, especially in facilities where frequent cleaning is required.
4. Versatile Packaging for Different Applications
To accommodate various usage scenarios, 70% IPA presaturated wipes are available in multiple packaging options. From easy-to-store canisters and convenient bulk rolls to individually wrapped sachets and resealable pouches, each packaging format is designed to maintain product integrity while offering ease of use. Businesses and laboratories can select the most suitable packaging for their specific cleaning requirements, maximizing efficiency while minimizing waste.
5. Easy to Use, Minimizing Contamination Risks
Traditional cleaning methods often require users to manually dilute and apply cleaning agents, increasing the risk of inconsistent application and contamination. Presaturated wipes eliminate these challenges by providing a ready-to-use solution that streamlines cleaning tasks. This not only saves time but also ensures that every cleaning session adheres to cleanroom protocols, significantly reducing the risk of contamination.
Applications and Industry-Specific Benefits

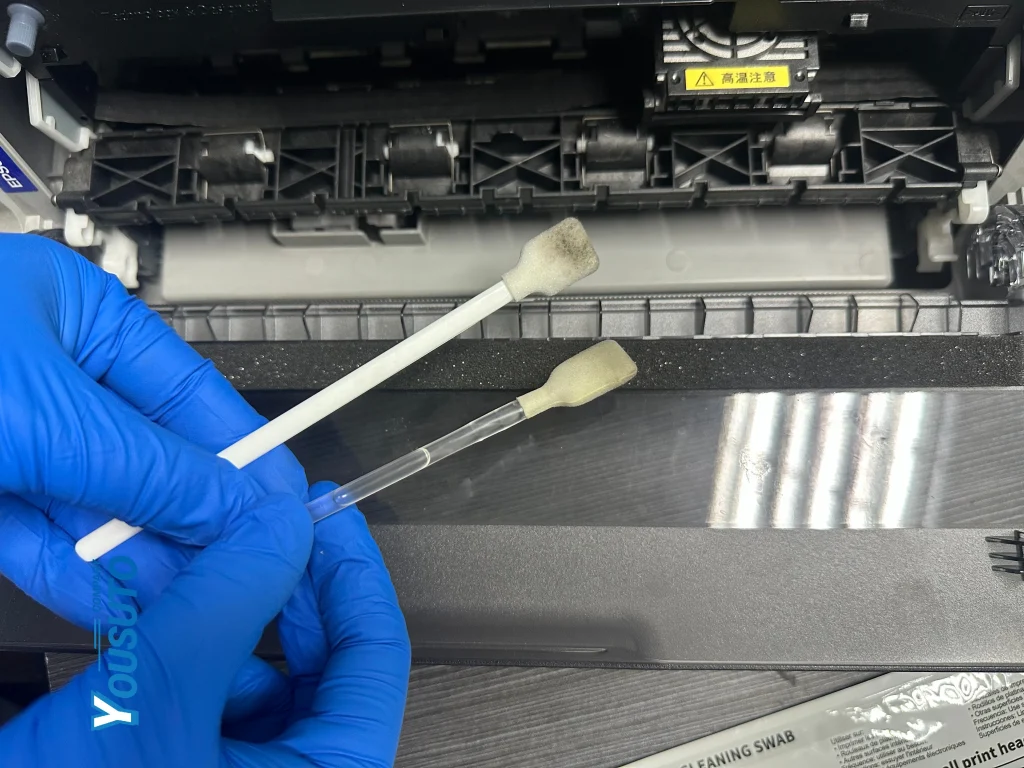
take an alcohol swab or cloth soaked in isopropyl or denatured alcohol and use it to wipe away any dirt or grime on the printhead.
Semiconductor Manufacturing
In semiconductor fabrication, even microscopic contaminants can cause chip defects and reduce yield. 70% IPA presaturated wipes provide an efficient solution for cleaning equipment and production lines, preventing dust and microbial buildup while maintaining the precision required in high-tech manufacturing.
Pharmaceutical Industry
Cleanroom environments in pharmaceutical manufacturing require rigorous disinfection procedures. These wipes effectively eliminate bacteria and viruses while leaving no residue, making them ideal for maintaining sterile conditions in drug production and medical device manufacturing. The availability of various packaging options ensures that both large-scale production facilities and small research labs can find the perfect fit for their needs.
Electronics Assembly
In electronics manufacturing, dust, flux residues, and other contaminants can lead to short circuits and corrosion, compromising product performance and longevity. 70% IPA wipes efficiently remove surface residues and prevent electrostatic buildup, ensuring that delicate electronic components remain pristine throughout the assembly process.
Food Processing Industry
Food safety is a top priority in food production facilities. 70% IPA presaturated wipes are widely used for sanitizing processing equipment, packaging areas, and work surfaces. Their powerful disinfecting properties help maintain hygienic conditions, reducing the risk of microbial contamination and ensuring compliance with food safety regulations.
Innovative Technology for Superior Cleaning Performance
As cleanroom standards continue to evolve, traditional cleaning methods are struggling to keep up with the increasing demands for precision and reliability. 70% IPA presaturated wipes bridge this gap by offering a cutting-edge cleaning solution backed by advanced manufacturing technology.
Each wipe is designed to meet strict cleanroom requirements, ensuring that solvent compatibility, material integrity, and absorption efficiency are optimized for industrial use. Moreover, extensive quality control measures are in place to guarantee that every batch meets industry standards, providing customers with a reliable and effective cleaning tool.

In modern industrial and medical environments, it is essential to maintain cleanliness and sterility.
User feedback consistently highlights the benefits of presaturated wipes, particularly their convenience and performance consistency. Businesses and laboratories no longer have to worry about inconsistent solvent application, secondary contamination, or time-consuming cleaning procedures. Instead, they can focus on their core operations, confident that their cleaning protocols are both effective and compliant with industry regulations.
Sustainability and Safety: The Future of Cleanroom Cleaning
With growing concerns about environmental impact and workplace safety, companies are prioritizing sustainable cleaning solutions. By controlling solvent evaporation and reducing VOC emissions, 70% IPA presaturated wipes align with global sustainability goals while ensuring superior cleaning performance.
Additionally, the elimination of manual dilution and application reduces workplace hazards associated with improper handling of chemicals. These wipes provide a safer, user-friendly alternative that enhances workplace efficiency and hygiene while minimizing risks.
A New Era in Cleanroom Cleaning
In high-standard cleanroom environments, 70% isopropyl alcohol presaturated wipes stand out as a game-changing solution for efficient, consistent, and safe cleaning. Their ability to deliver precise solvent application, lint-free cleaning, and VOC reduction makes them indispensable in industries ranging from semiconductor and pharmaceutical manufacturing to electronics assembly and food processing.

When choosing the right wipes, consider different isopropyl alcohol (IPA) concentrations to meet your specific cleaning needs.
By incorporating cutting-edge technology and stringent quality control, these wipes ensure that cleanroom cleaning procedures are not only effective but also compliant with industry regulations. With growing environmental awareness and increased demand for precision cleaning, 70% IPA presaturated wipes represent the future of cleanroom maintenance, providing businesses with the ultimate combination of efficiency, safety, and sustainability.
For industries that prioritize quality and contamination control, making the switch to 70% IPA presaturated wipes is a step toward enhanced performance and reliability—ensuring a cleaner, safer, and more productive working environment.